Choosing a bike
Choosing the right bike and setting it up correctly are crucial for long days in the saddle.
Personal preferences play a big part in the bike/specifications you select. To get you in the zone, however, here’s a bunch of tips and recommendations courtesy of the Kennett Brothers, who surveyed 500 Tour Aotearoa and Kōpiko riders in 2020 to see what bike set-up they preferred.
In short, the most common bikepacking bike in New Zealand is a 29er hardtail mountain bike with front suspension and 2.2 inch tyres, but read on to learn more.
Frame size
- frame size – this is critical to a comfortable ride; when you stand astride the bike there should be 5–10cm clearance between the top tube and your crotch
- tyre clearance – your bike should be able to fit a 2.0 to 2.2 inch tyre and still have 5–10mm clearance each side to allow for mud/buckled wheel
- avoid toe-wheel-overlap – this is where your toes hit the front wheel when cornering
Frame material
- carbon fibre – the most popular option due to it being light & strong, with some flex to dampen vibrations; the disadvantage is that bags rubbing on the frame can cause damage, which is almost impossible to repair (wrapping tape around the frame rub-areas will reduce wear)
- aluminium alloy – reasonably lightweight, common & inexpensive; it is generally stiffer/less comfortable than carbon fibre or steel
- steel – durable, repairable, good load-bearing, although it can feel heavy/rigid
- titanium – lightweight but very expensive and tricky to repair
Pro tip: consider upgrading your old bike with new components, such as carbon handlebars and/or forks to reduce weight/improve damping.
Suspension
- hard-tail bike with front suspension – this is the most popular option; a lock-out function will stop ‘bobbing’ when climbing
- full-suspension bike – has less space in the main triangle for a frame bag and there are more parts to go wrong
- bikepacking-specific bikes with no suspension/gravel bikes – these are also popular, often lightweight, but less comfy

A solid, well-balanced bikepacking set-up (Jonathan Kennett)
Wheel size
- 29 inch/700c (most popular) – larger diameter wheels roll faster and smoother
- 27.5/650b (also popular) – the Kennetts recommend sticking with this size if that’s what you’ve got: ‘The difference is negligible. Save your money for pies.’
Tyres
- your tyre choice – ultimately this is a balancing act between comfort, safety and speed
- tyre width – narrow tyres are faster on smooth roads but transmit more vibrations; wider tyres at lower pressures float over rougher terrain & provide more traction/comfort
- 2.2-inch tyres – are the most popular in Tour Aotearoa
- Kennetts' recommendation – a minimum width of 1.6 inch/40mm, allowing 5–10mm clearance between the tyre and frame
- threads per inch (TPI) – an indicator of quality; choose 120 TPI (min.) for good traction and a smooth ride
- tubes versus tubeless – tubeless most popular being lighter, faster and more puncture resistant, although more difficult to set-up/repair
Pro-tip: before buying a cross-country or hybrid bike, check that the frame will take tyres over 40mm wide
Brakes
- hydraulic disc brakes (most popular) – stay balanced and powerful for longer than cable brakes
- cable disc brakes (mostly Avid BB7s) – reliable and easily repairable, but avoid cheap cable brakes
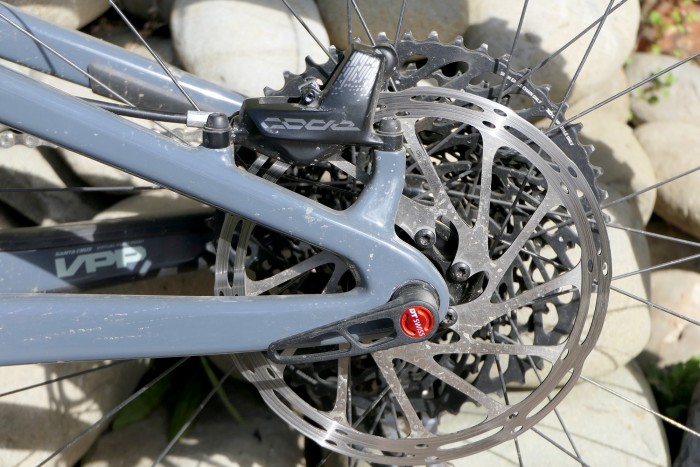
High-quality disc brakes, and a shiny new carbon frame (bennettandslater.co.nz)
Gears
- The ideal bikepacking bike has a wide range of gears – particularly a low climbing gear – and having more chainrings generally makes that more likely
- Most new bikes come with one chainring and a rear cluster with a huge range of cogs. Try to get a 28 or 30 tooth front ring, and you will have good climbing gears with a 10–50 tooth cassette
Handlebars
- flat MTB bars (most popular) – best handling on gnarly downhills
- bar ends – more hand positions, and allow you to lean forward on climbs to open up your lungs
- drop bars – aerodynamic and provide numerous hand positions; not ideal for rough downhills and forward position means more pressure on hands and neck muscles
- special bikepacking/dirt drop bars – set higher than road drops, providing additional comfort
- Jones bars – specifically designed for bikepacking and put wrists in a more relaxed, natural position; provide different hand positions and places to attach bags/navigation tools
- aero bars – negligible speed gain but do relieve pressure on hands
Pro-tip: The Kennetts recommend MTB bars with bar ends and aero bars. Changing your handlebar stem can also increase comfort.
Saddle
- seat selection – the fit is critical as everyone’s sit bones are different
- materials – leather saddles are popular, and comfortable once broken in but need regular conditioning, hence the popularity of synthetics
Pro-tip: Jonathan Kennett is a fan of the WTB synthetic saddle which has a ‘love groove’ and good sit bone support but adds that ‘it really is personal choice’. 'Try out different seats, and never just settle for the standard one your bike comes with.'
Bike bags
- Carry everything on the bike – rather than your back – to reduce pressure on your seat.
- Most people use a combination of three types of bag – a rear seat bag, frame bag, and handlebar roll bag which is great for sleeping gear or tent
- Increase capacity with small bags strapped to either end of your top tube (good for tools, spare tube or snacks), and small cages/racks attached to the fork blades of specialist bikepacking bikes
Pro-tip: Invest in quality bike bags, such as New Zealand-made Stealth, Dancing Moose, Robo-Kiwi and Cactus; they can make a bag perfectly suited to your frame size and shape.
This summary of tips and recommendations have been provided by the Kennett Brothers; for more in-depth information, purchase their fab Bikepacking Aotearoa guidebook – you can find out more about the book and buy your copy here.
